Practice Your OAuth Flows
Something’s in the air… It’s a fresh new update of my Salesforce OAuth Flows application! I’ve actually done a major overhaul of the front-end. Everything is still relying on Node as back-end and Express as front-end, but the main changes are in the user experience.
In this new release, you can walk through each OAuth flow in a step-by-step fashion. This allows you to inspect what is happening in each part of the flow. You can see which input is provided towards the Salesforce OAuth endpoints and what is being returned. The goal is to give an even deeper insight into these tricky beasts.
If you can’t wait to get started, I’ve made it even easier to run the application locally. Just go to the project’s GitHub page and read the README.

Inspiration
This overhaul idea came after doing some Trailhead modules. I ran into a module on OpenID Connect. The hands-on section of this module was using a Heroku app to connect to your Salesforce Trailhead environment, not unlike the Node app I’d already built. You can find this app here.
I knew that someone at Salesforce must’ve created it, so I reached out to some colleagues. To my pleasant surprise, I not only got approval to reuse the user experience, I even got access to the source code! From that moment on, the goal was set!

Approach
My plan is to create a more detailed post on how I achieved this from a technical point of view, but here I want to focus on the actual workings of the app. The only thing you need to know is that it took a whole bunch of messing with CSS, a new understanding of server-side JavaScript, and endless patience.
In the end I successfully created a very similar user experience as the original app. There’s still many tweaks that I’d like to do, but for now it’s great for a pilot release.
Home Screen
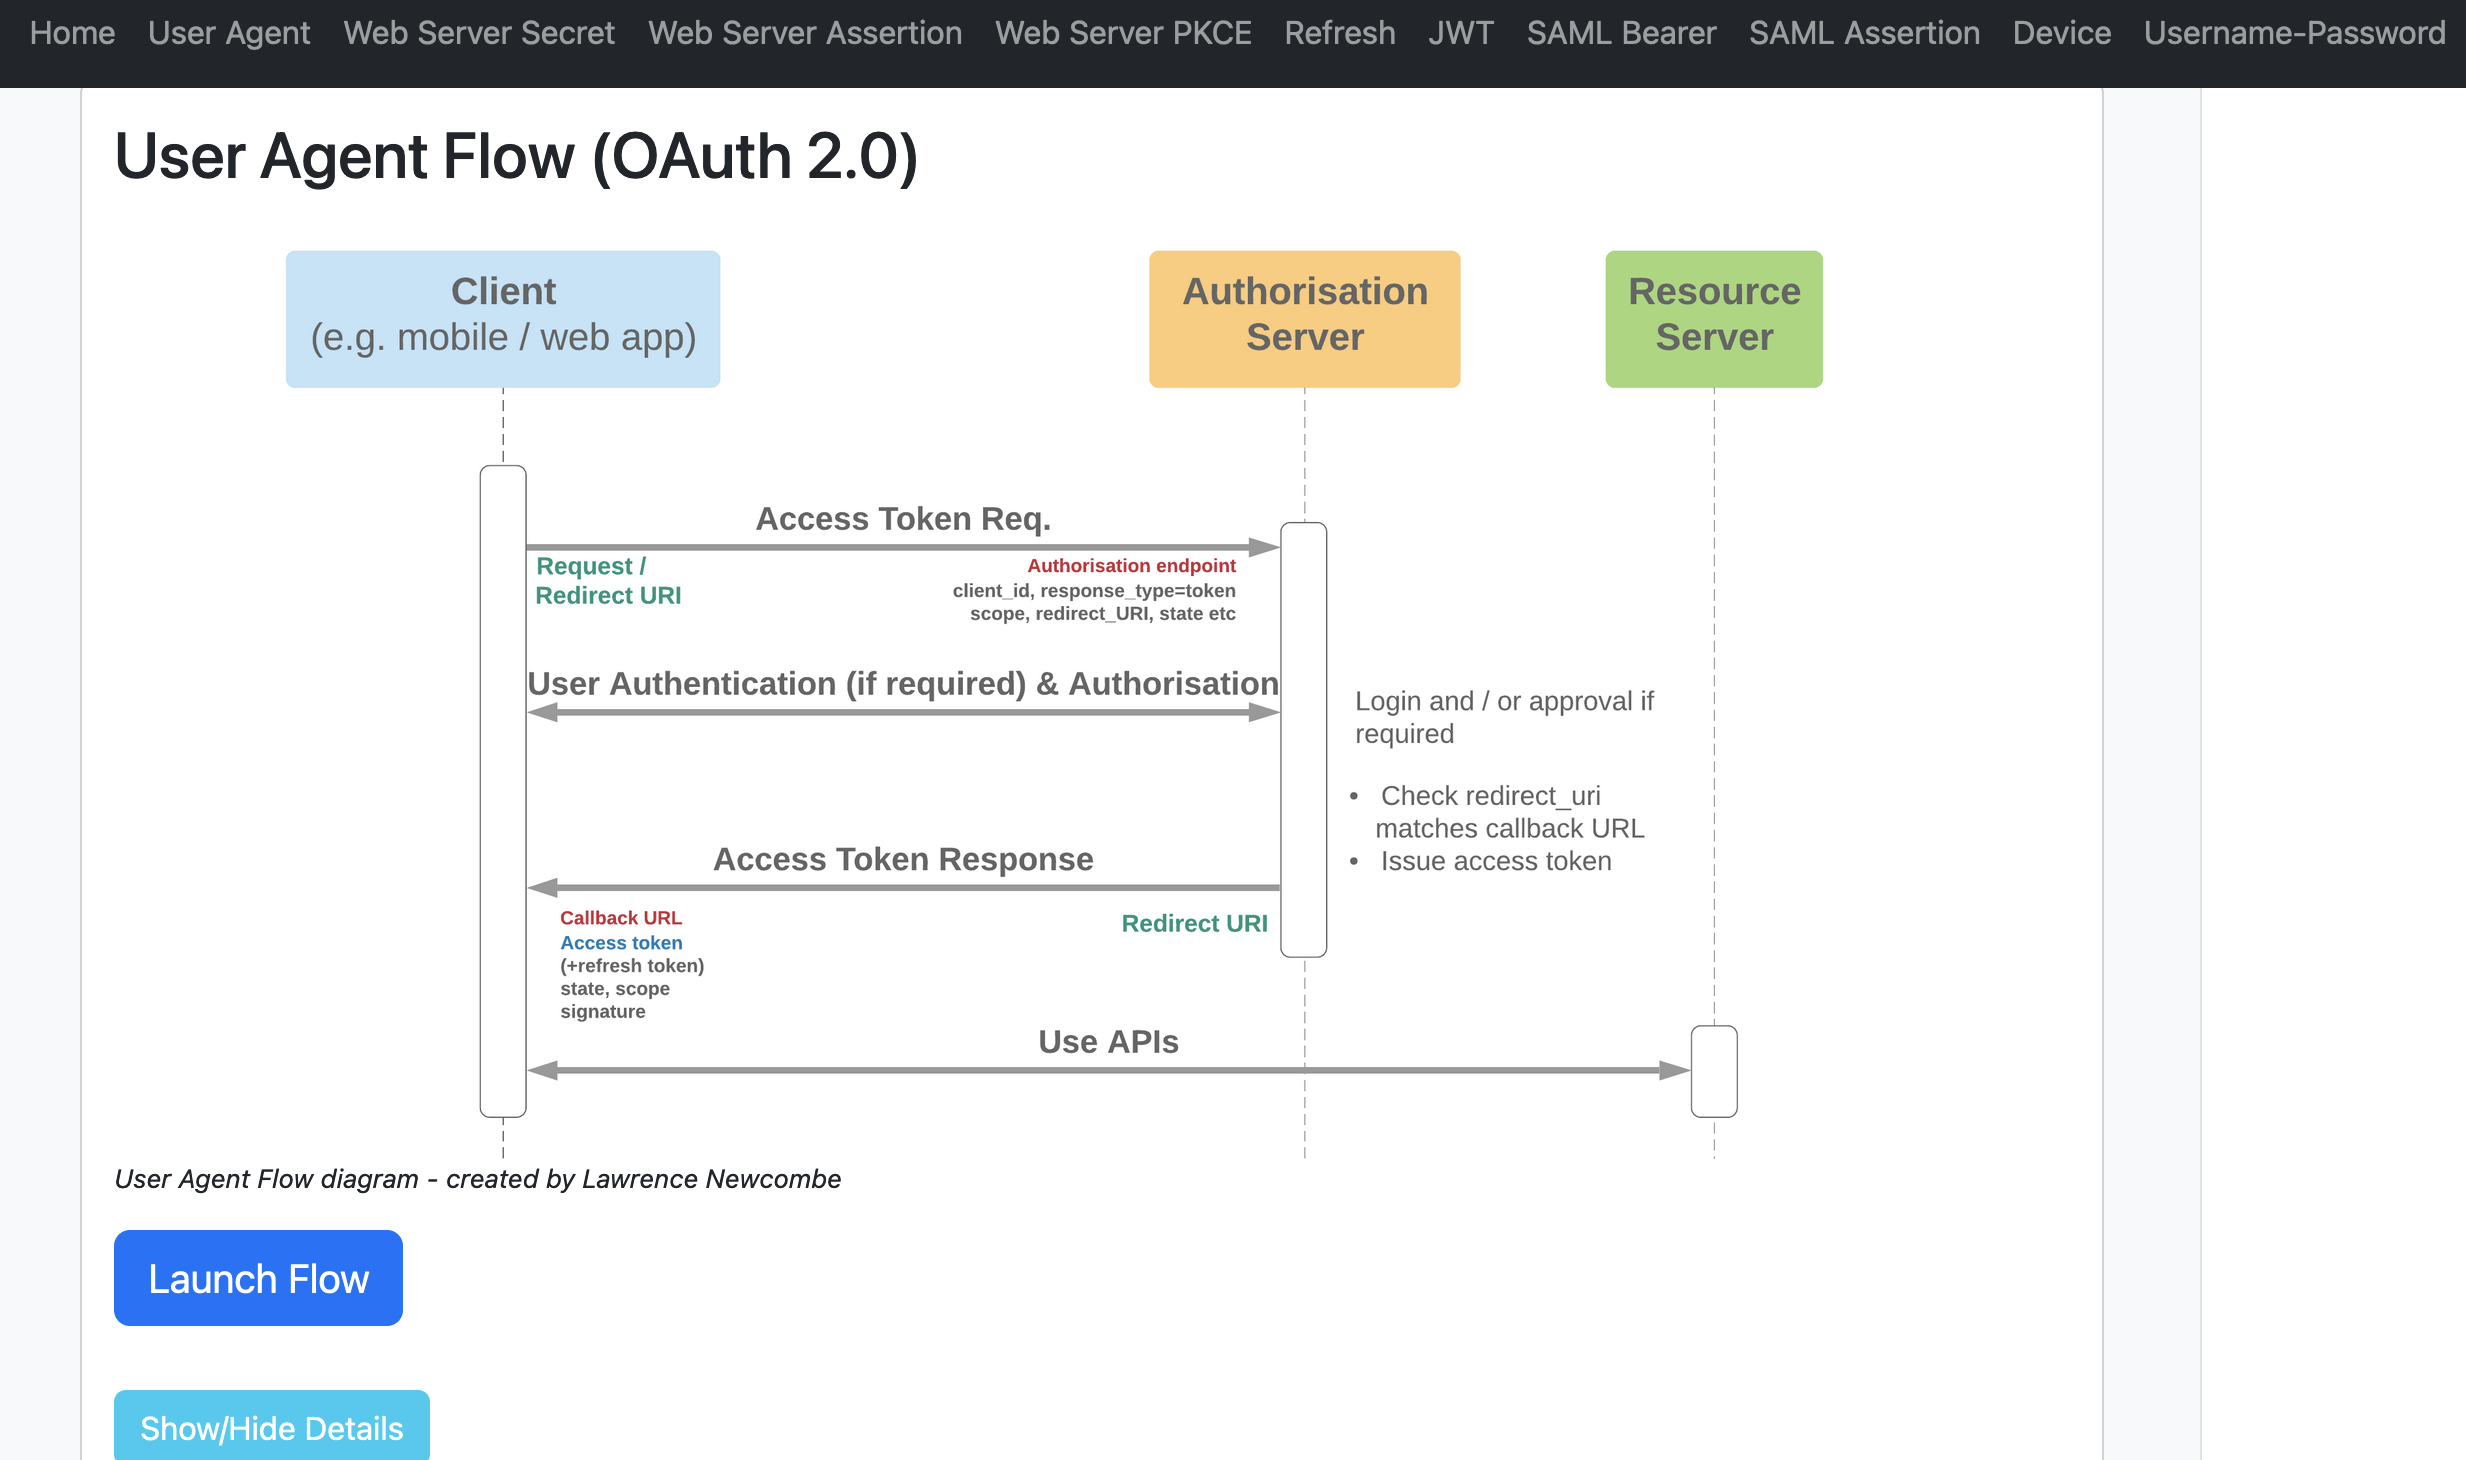
If you’ve seen the home screen before, you might notice that the layout changed slightly. It’s now easier than ever to run the flow you want. Just navigate to your desired flow in the navigation bar, then hit “Launch Flow”.

For now you can choose from 10 flows. There have been new flows added to Salesforce Identity since then. It’s definitely one of my goals to add more flows to the list.
Flow Screen
Once you’ve launched the flow, it’s very different from the previous version of the app. You no longer see the screen redirecting a couple of times before showing you the query output. Instead, you’ll see that no request has been made yet. The data that you’ve entered in your .env file will be visible, e.g. your client ID and secret.

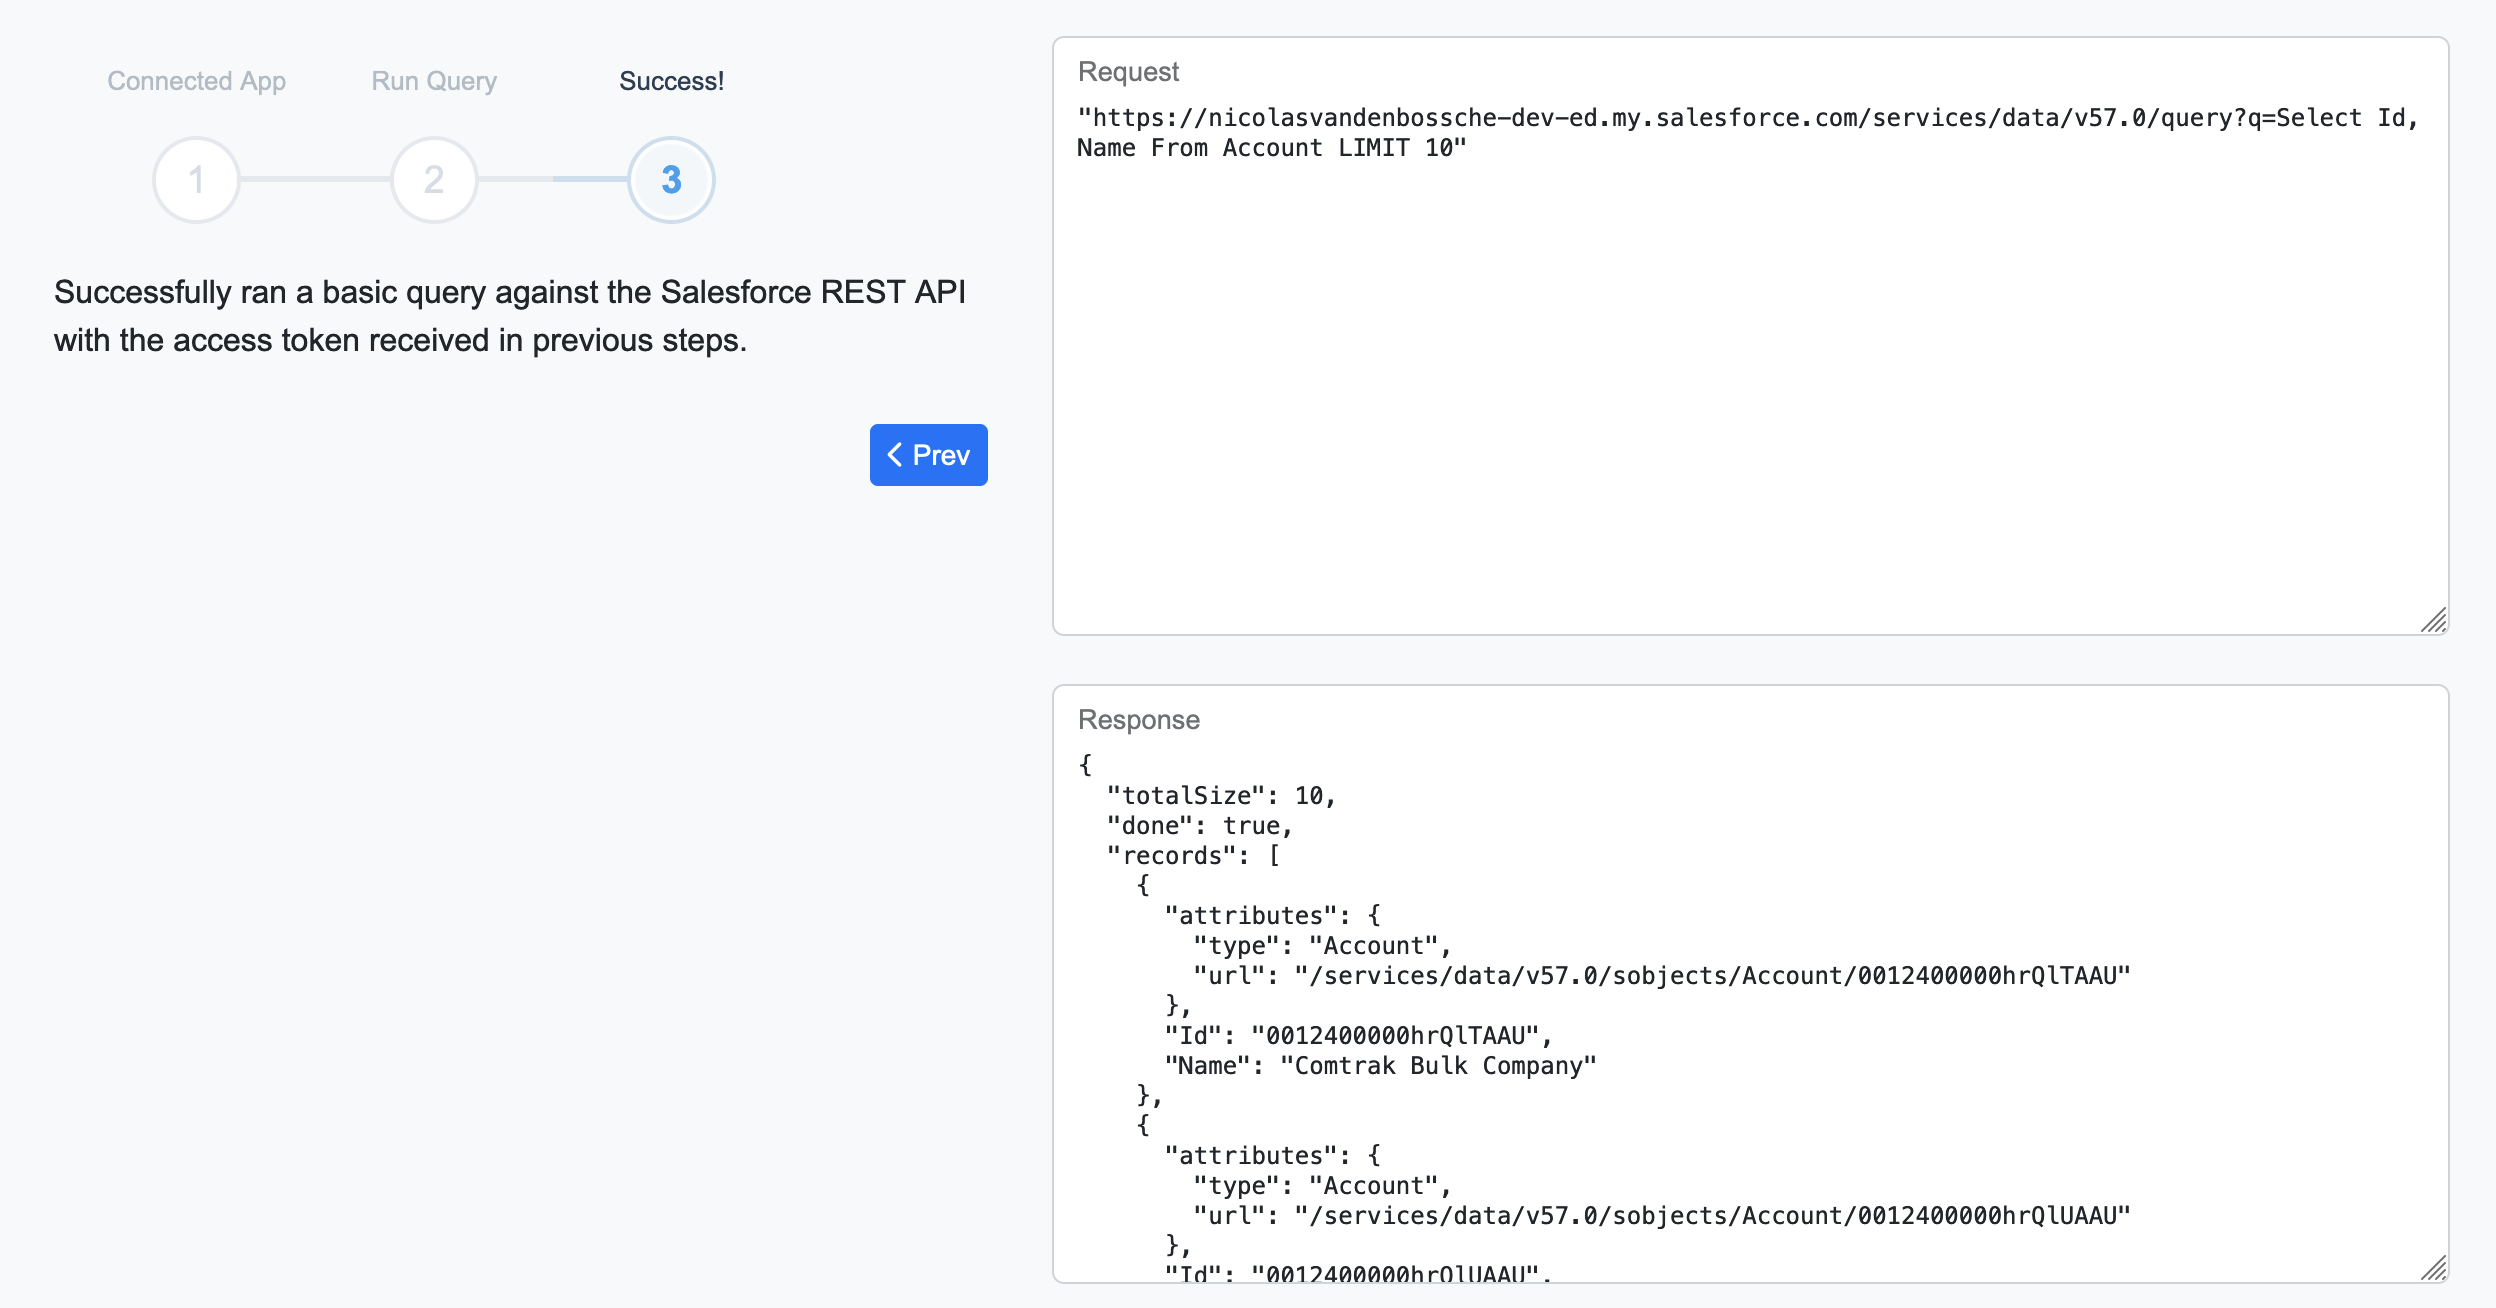
By clicking “Next”, you will execute the next step in the OAuth flow. You will see the request that was made, as well as the reply received.

Depending on the flow, there might be more steps to go through. You can keep clicking next and inspect the request and reply sent to and received from Salesforce. Until you finally receive the response to a simple SOQL query, indicating a working access token.

Conclusion
With this brief overview, we’ve seen how you can leverage the Node app to learn more about different OAuth flows for Salesforce. Take it for a spin yourself!
Any questions, I’m more than happy to chat about this topic. So just reach out on LinkedIn!